图像平滑的目标是,使用不同的低通滤波器进行模糊 自定义图像滤波器进行卷积(2D 卷积)
1. 图像卷积 - cv2.filter2D 函数
OpenCV 库,cv2.fliter2D 函数用于对图片根据特定的核(kernel) 进行卷积操作. 该函数可以将任意线性滤波器应用于图像. 支持 in-place 操作. 当卷积核超出图像时,该函数会根据指定的边界模式(border mode)插入特定的像素值.
用法:
cv.filter2D(src, dst, ddepth, kernel, anchor=(-1, -1), delta=0, borderType = BORDER_DEFAULT)
#ddepth – desired depth of the destination image;
#if it is negative, it will be the same as src.depth();
#the following combinations of src.depth() and ddepth are supported:
#src.depth() = CV_8U, ddepth = -1/CV_16S/CV_32F/CV_64F
#src.depth() = CV_16U/CV_16S, ddepth = -1/CV_32F/CV_64F
#src.depth() = CV_32F, ddepth = -1/CV_32F/CV_64F
#src.depth() = CV_64F, ddepth = -1/CV_64F
#when ddepth=-1, the output image will have the same depth as the source.
函数计算的是关联性,而非卷积(The function does actually compute correlation, not the convolution):
$$ \texttt{dst} (x,y) = \sum _{ \stackrel{0\leq x' < \texttt{kernel.cols},}{0\leq y' < \texttt{kernel.rows}} } \texttt{kernel} (x',y')* \texttt{src} (x+x'- \texttt{anchor.x} ,y+y'- \texttt{anchor.y} ) $$
采用线性 filter 处理图像(In-place). 以平均滤波器(mean filter) 为例: 假设 5x5 的平均滤波器 filter kernel: 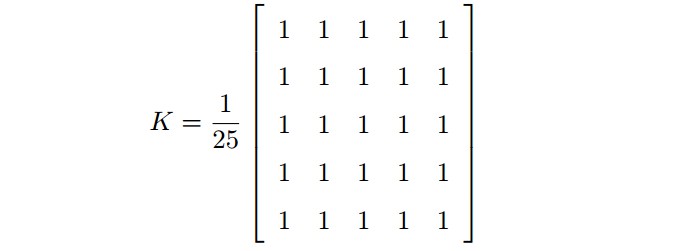
则,具体操作为: 将 kernel 放在图像的一个像素 A 上,求与 kernel 对应的图像上 25(5x5) 个像素的和,在取平均数,用这个平均数替代像素 A 的值. 重复以上操作直到将图像的每一个像素值都更新一遍.
import numpy as np
import cv2 as cv
from matplotlib import pyplot as plt

img = cv.imread('opencv_logo.png')
kernel = np.ones((5,5), np.float32)/25
dst = cv.filter2D(img, -1, kernel)
plt.subplot(121); plt.imshow(img); plt.title('Original')
plt.xticks([]); plt.yticks([])
plt.subplot(122); plt.imshow(dst); plt.title('Averaging')
plt.xticks([]); plt.yticks([])
plt.show()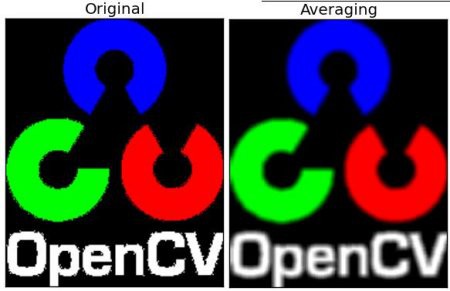
2. 图像模糊 - 图像平滑
使用低通滤波器可以达到图像模糊的目的. 有助于去除噪音. 其实就是去除图像中的高频成分(比如:噪音,边界). 所以边界也会被模糊一点(当然,也有一些模糊技术不会模糊掉边界).
OpenCV 提供了四种图像模糊技术:
- 平均模糊
- 高斯模糊
- 中值模糊
- 双边滤波
2.1. 平均模糊
采用归一化卷积框,将卷积框覆盖区域所有像素的平均值来代替中心元素.
- cv2.blur(img, (5, 5)) - (5, 5) 是平滑内核大小,等同于 np.ones((5, 5), np.float32)/9.
- cv2.boxFilter() - 如果不使用归一化卷积框,则设置参数
normalize=False.
假设 3x3 的归一化卷积框:
import cv2
import numpy as np
from matplotlib import pyplot as plt

img = cv2.imread('opencv-logo-white.png')
blur = cv2.blur(img,(5,5))

plt.subplot(121)
plt.imshow(img)
plt.title('Original')
plt.xticks([])
plt.yticks([])

plt.subplot(122)
plt.imshow(blur)
plt.title('Blurred')
plt.xticks([])
plt.yticks([])
plt.show()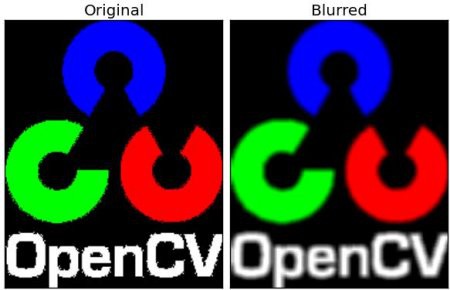
2.2. 高斯模糊
高斯模糊是,把卷积核替换为高斯核(方框大小不变,但方框内的值符合高斯分布,方框中心值最大,其余根据距离中心元素的距离递减,构成高斯分布),相当于原来的求平均,变换为求加权平均数.
cv2.GaussianBlur() 函数,需要指定高斯核的宽和高(必须是奇数),以及高斯函数沿 X 和 Y 方向的标准差. 如果只指定了 X 方向的的标准差, Y 方向也会取相同值. 如果两个标准差都是 0,那么函数会根据核函数的大小自己计算.
高斯滤波可以有效的从图像中去除高斯噪音.
也可以采用 cv2.getGaussianKernel() 函数自定义构建高斯核. 只需更改一行代码:
#0 是指根据窗口大小(5,5)来计算高斯函数标准差
blur = cv2.GaussianBlur(img, (5,5), 0)
2.3. 中值模糊
中值模糊是,采用与卷积框对应像素的中值来替代中心像素的值.
中值滤波经常用来去除椒盐噪声.
平均值滤波和高斯滤波都是用计算得到的一个新值来取代中心像素的值,而中值滤波是用中心像素周围(也可以使他本身)的值来取代该像素值. 中值卷积核的大小也应是一个奇数. 例如,给原始图像加上 50% 的噪声然后再使用中值模糊:
median = cv.medianBlur(img, 5)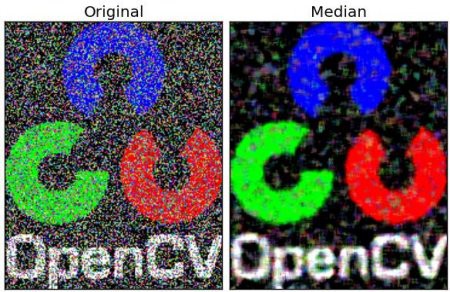
2.4. 双边滤波
双边滤波,同时使用空间高斯权重和灰度值相似性高斯权重. 空间高斯函数确保只有邻近区域的像素对中心点有影响; 灰度值相似性高斯函数确保只有与中心像素灰度值相近的才会被用来做模糊运算. 会确保边界不会被模糊掉,因为边界处的灰度值变化比较大.
cv2.bilateralFilter() 能在保持边界清晰的情况下有效的去除噪音. 但是该滤波函数与其他滤波器相比会比较慢. 高斯滤波器是求中心点邻近区域像素的高斯加权平均值. 这种高斯滤波器只考虑像素之间的空间关系,而不会考虑像素值之间的关系(像素的相似度). 所以这种方法不会考虑一个像素是否位于边界. 因此边界也会别模糊掉,而这正不是想要的.
更多细节参考 - bilateral filtering
cv2.bilateralFilter(src, d, sigmaColor, sigmaSpace)[1] - src - 源图像
[2] - d – Diameter of each pixel neighborhood that is used during filtering. 滤波器间使用的每个像素邻域的直径. (If it is non-positive, it is computed from sigmaSpace).
[3] - 最后两个 sigmaColor 参数 - 空间高斯函数标准差和灰度值相似性高斯函数标准差(如果它们很小(<10),过滤器将不会有太多的效果,而如果它们很大(> 150),将会产生非常强烈的效果,使得图像显得“卡通”.) 例如:
#9 邻域直径,两个 75 分别是空间高斯函数标准差,灰度值相似性高斯函数标准差
blur = cv2.bilateralFilter(img, 9, 75, 75)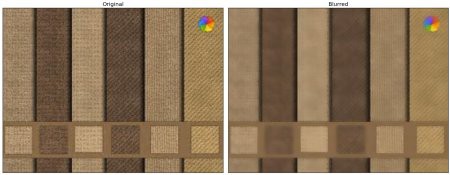
上图中的纹理被模糊掉了,但是边界还在.
汇总如下:
import cv2
import numpy as np
from matplotlib import pyplot as plt

img = cv2.imread('test.jpg')
#blur = cv2.blur(img, (5, 5))
#blur = cv2.GaussianBlur(img, (5, 5), 0)
#median = cv2.medianBlur(img, 5)
blur = cv2.bilateralFilter(img, 9, 75, 75)

plt.subplot(121), plt.imshow(img)
plt.title('Original'), plt.xticks([]), plt.yticks([])
plt.subplot(122), plt.imshow(blur)
plt.title('Averaging'), plt.xticks([]), plt.yticks([])
plt.show()
3. 参考
[1] - OpenCV官方教程中文版(For Python) - 段力辉(译)