Github - NVIDIA/DALI
docs - NVIDIA DALI documentation
NVIDIA/DALI(NVIDIA Data Loading Library) 库是用于加速深度学习应用中数据加载与预处理的库. 其提供了高度优化的构建模块(highly optimized building blocks)的集合,以用于图像、视频、音频等数据的加载和处理.
深度学习应用中,往往需要复杂的、多阶段的数据预处理管道,如,加载、接码、裁剪、尺寸resize、颜色和空间增强,格式转换等等很多其他数据增强. 这些往往是在 CPU 上进行的,其会遇到计算瓶颈问题,限制了训练和推断时的性能和可扩展性.
另外,深度学习框架有很多不同的数据预处理实现,这就为网络训练和推断工作流的可移植性和代码维护带来了挑战.
DALI 库通过将数据预处理转移到 GPU 上,来解决 CPU 的瓶颈问题. 此外,DALI 依赖于其自身的执行引擎,以最大化输入管道的流量.

1. DALI 特点
DALI 库具有如下特点:
[1] - 易用的 Python API 函数风格.
[2] - 支持多种数据格式,如LMDB, RecordIO, TFRecord, COCO, JPEG, JPEG 2000, WAV, FLAC, OGG, H.264, VP9, HEVC.
[3] - 易于与深度学习框架整合,如TensorFlow, PyTorch, MXNet, PaddlePaddle.
[4] - 支持 CPU 和 GPU 执行模式.
[5] - 可跨多 GPUs 扩展.
[6] - 灵活图模式(graphs),便于构建自定义管道.
[7] - 具有对定制操作子(ops) 可扩展性.
[8] - 可加速图像分类(ResNet50)、目标检测(SSD) 以及 ASR 模型.
[9] - 基于 GPUDirect Storage 可以直接在存储和GPU显存间数据传输.
[10] - 易于与 NVIDIA Triton Inference Server 和 DALI TRITON Backend 的整合.
[11] - 开源
DALI 支持的平台可见: Supported NVIDIA hardware, CUDA, OS, and CUDA driver
2. DALI 安装
DALI 库安装依赖项:
[1] - Linux x64
[2] - NVIDIA Driver,支持 CUDA10.0+,如 410.48 以后驱动版本
[3] - 深度学习框架,如
- MXNet 1.3 mxnet-cu100 or later.
- PyTorch 0.4 or later.
- TensorFlow 1.7 or later.
2.1. NGC 容器安装
NVIDIA GPU Cloud 中的 TensorFlow, PyTorch 和 MXNet containers(18.07 以后版本) 已经预安装了 DALI 库.
2.2. PIP 安装
2.2.1. nvidia-dali
[1] - CUDA 10
pip install --extra-index-url https://developer.download.nvidia.com/compute/redist --upgrade nvidia-dali-cuda100[2] - CUDA 11.0
pip install --extra-index-url https://developer.download.nvidia.com/compute/redist --upgrade nvidia-dali-cuda1102.2.2. nvidia-dali-tf-plugin
DALI TensorFlow 插件,
[1] - CUDA 10
pip install --extra-index-url https://developer.download.nvidia.com/compute/redist --upgrade nvidia-dali-tf-plugin-cuda100[2] - CUDA 11.0
pip install --extra-index-url https://developer.download.nvidia.com/compute/redist --upgrade nvidia-dali-tf-plugin-cuda1102.3. DALI 源码安装
Compiling DALI from source
3. DALI 简单使用
深度学习框架提供的数据输入和数据增强管道,一般可分为如下两类:
[1] - 快速,但不灵活 - C++ 编码,它对外保留为单一的 python 对象,仅提供了特定的操作集和顺序.
[2] - 慢,但灵活 - 基于 C++ 或 Python 编码的构建模块集合,其可以任意组合数据管道,但速度变慢. 一个最大的问题是,这种数据管道会遇到 Python 的 GIL(Global Interpreter Lock) 问题. 这就需要采用多进程、有效的输入管道需要复杂的设计.
3.1. DALI Pipeline 类
DALI 中最重要的类型,其包含了所有必要信息以及与定义、构建、运行等相关的函数.
from nvidia.dali.pipeline import Pipeline
#help(Pipeline) 可输出接口信息
3.2. 定义 Pipeline
以猫狗分类为例.
数据集路径结构如下:
from __future__ import print_function
import os.path
import fnmatch

for root, dir, files in os.walk("data/images"):
        depth = root.count('/')
        ret = ""
        if depth > 0:
            ret += "  " * (depth - 1) + "|-"
        print (ret + root)
        for items in fnmatch.filter(files, "*"):
                print (" " * len(ret) + "|-" + items)
如:
images
|-file_list.txt
|-images/dog
  |-dog_4.jpg
  |-dog_5.jpg
  |-dog_9.jpg
  |-dog_6.jpg
  |-dog_3.jpg
  |-dog_7.jpg
  |-dog_10.jpg
  |-dog_2.jpg
  |-dog_8.jpg
  |-dog_1.jpg
  |-dog_11.jpg
|-images/kitten
  |-cat_10.jpg
  |-cat_5.jpg
  |-cat_9.jpg
  |-cat_8.jpg
  |-cat_1.jpg
  |-cat_7.jpg
  |-cat_6.jpg
  |-cat_3.jpg
  |-cat_2.jpg
  |-cat_4.jpg
这里,创建的 pipeline 将从数据集路径中读取图片,解码图片,并返回 (image, labels) 对.
可以采用 pipeline_def 装饰器创建管道. 然后在 simple_pipline 函数定义要进行的操作和计算流.
from nvidia.dali import pipeline_def
import nvidia.dali.fn as fn
import nvidia.dali.types as types

image_dir = "data/images"
max_batch_size = 8


@pipeline_def
def simple_pipeline():
    #读取(编码)图片和标签
    jpegs, labels = fn.readers.file(file_root=image_dir)
    #解码图片为RGB
    images = fn.decoders.image(jpegs, device='cpu')

    return images, labels
3.3. 构建 Pipeline
如:
pipe = simple_pipeline(batch_size=max_batch_size, num_threads=1, device_id=0)
pipe.build()
3.4. 运行 Pipeline
构建管道后,运行,可以得到 batch 的结果.
pipe_out = pipe.run()
print(pipe_out)
输出如:
(<nvidia.dali.backend_impl.TensorListCPU object at 0x7f789448ddb0>,
<nvidia.dali.backend_impl.TensorListCPU object at 0x7f789448dc70>)
pipe_out 变量是一个 2 个元素组成的元组,每个元素都是 TensorListCPU 对象,分别包含 CPU tensors 组成的列表. 可以将转换为 Numpy array,如:
images, labels = pipe_out
print("Images is_dense_tensor: " + str(images.is_dense_tensor()))
print("Labels is_dense_tensor: " + str(labels.is_dense_tensor()))
输出如:
Images is_dense_tensor: False
Labels is_dense_tensor: True
返回的 labels 值如:
import numpy as np

labels_tensor = labels.as_tensor()
print (labels_tensor.shape())
print (np.array(labels_tensor))
输出如:
[8, 1]
[[0]
 [0]
 [0]
 [0]
 [0]
 [0]
 [0]
 [0]]
返回的 images 值需要对 TensorList 中的所有 tensors 进行循环,如:
from __future__ import division
import matplotlib.gridspec as gridspec
import matplotlib.pyplot as plt

def show_images(image_batch):
    columns = 4
    rows = (batch_size + 1) // (columns)
    fig = plt.figure(figsize = (32,(32 // columns) * rows))
    gs = gridspec.GridSpec(rows, columns)
    for j in range(rows*columns):
        plt.subplot(gs[j])
        plt.axis("off")
        plt.imshow(image_batch.at(j))
    plt.show()

#
show_images(images)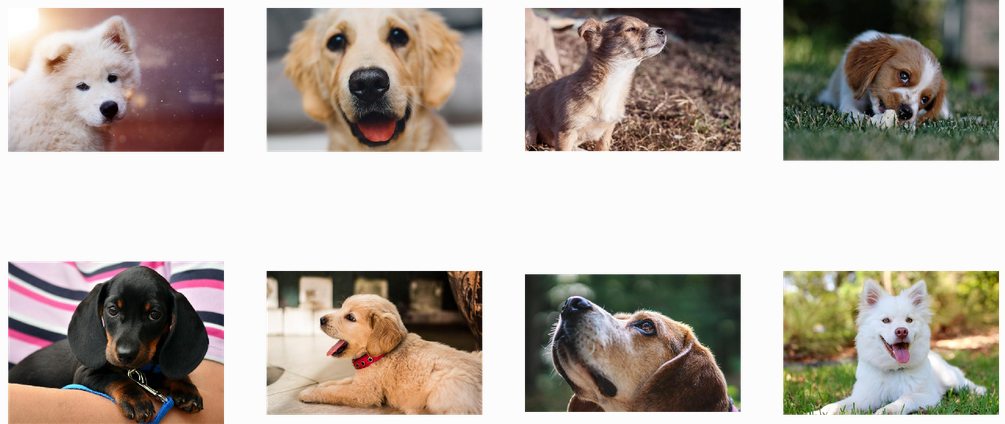
3.5. 数据增强
3.5.1. Random shuffle
随机打乱数据顺序.
@pipeline_def
def shuffled_pipeline():
    jpegs, labels = fn.readers.file(file_root=image_dir, random_shuffle=True, initial_fill=21)
    #initial_fill:缓存的容量. 默认是 1000,适用于包含大规模样本的数据集.
    images = fn.decoders.image(jpegs, device='cpu')

    return images, labels

#
pipe = shuffled_pipeline(batch_size=max_batch_size, num_threads=1, device_id=0, seed=1234)
pipe.build()

#
pipe_out = pipe.run()
images, labels = pipe_out
show_images(images)
输出如:

3.5.2. Rotate
DALI 不仅可以从磁盘读取图片,并 batch 化为 tensors;还可以对图片进行各种数据增强.
图片固定角度旋转.
@pipeline_def
def rotated_pipeline():
    jpegs, labels = fn.readers.file(file_root=image_dir, random_shuffle=True, initial_fill=21)
    images = fn.decoders.image(jpegs, device='cpu')
    rotated_images = fn.rotate(images, angle=10.0, fill_value=0) #每张图片都旋转10度

    return rotated_images, labels

#
pipe = rotated_pipeline(batch_size=max_batch_size, num_threads=1, device_id=0, seed=1234)
pipe.build()

#
pipe_out = pipe.run()
images, labels = pipe_out
show_images(images)
输出如:
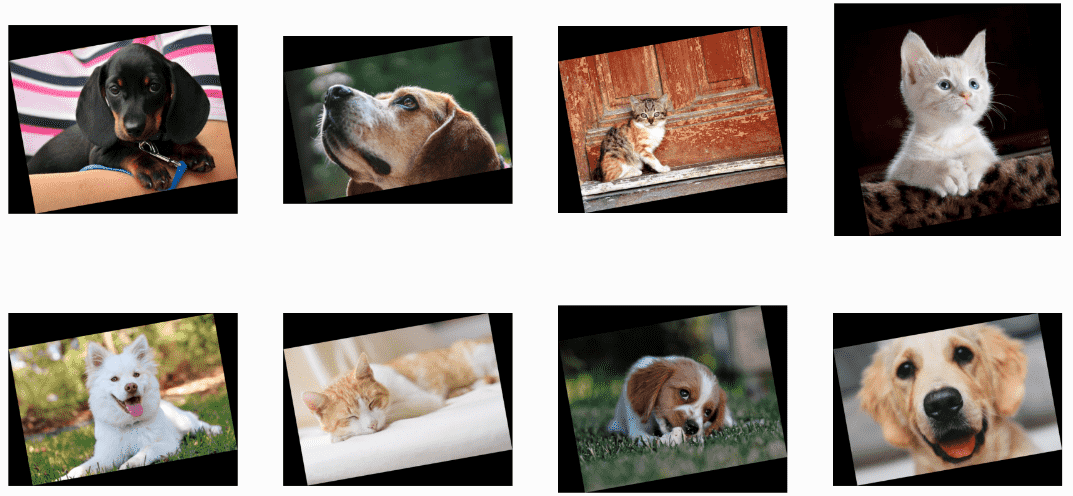
3.5.3. RandomRotated
随机旋转一定角度.
@pipeline_def
def random_rotated_pipeline():
jpegs, labels = fn.readers.file(file_root=image_dir, random_shuffle=True, initial_fill=21)
images = fn.decoders.image(jpegs, device='cpu')
angle = fn.random.uniform(range=(-10.0, 10.0)) #随机旋转角度
rotated_images = fn.rotate(images, angle=angle, fill_value=0)
return rotated_images, labels
#
pipe = random_rotated_pipeline(batch_size=max_batch_size, num_threads=1, device_id=0, seed=1234)
pipe.build()
#
pipe_out = pipe.run()
images, labels = pipe_out
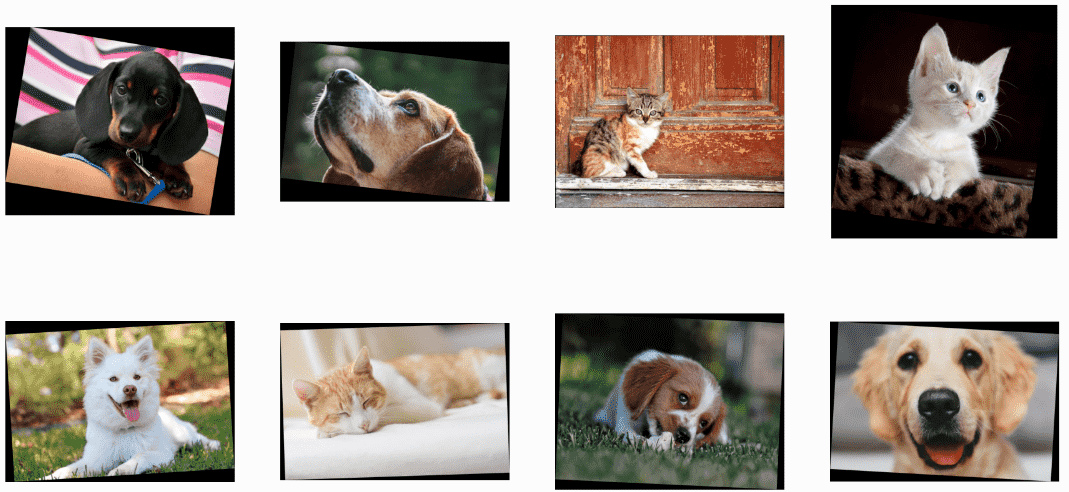
show_images(images)输出如:

3.6. GPU 加速
DALI 库提供了 GPU 加速操作子,用于提升数据输入和数据增强的速度,而且易于扩展到 multi-GPU 系统.
3.6.1. tensors 复制到 GPU
如:
@pipeline_def
def random_rotated_gpu_pipeline():
    jpegs, labels = fn.readers.file(file_root=image_dir, random_shuffle=True, initial_fill=21)
    images = fn.decoders.image(jpegs, device='cpu')
    angle = fn.random.uniform(range=(-10.0, 10.0))
    rotated_images = fn.rotate(images.gpu(), angle=angle, fill_value=0)#gpu

    return rotated_images, labels

#
pipe = random_rotated_gpu_pipeline(batch_size=max_batch_size, num_threads=1, device_id=0, seed=1234)
pipe.build()

#
pipe_out = pipe.run()
print(pipe_out)
输出如:
(<nvidia.dali.backend_impl.TensorListGPU object at 0x7f77f819a070>,
<nvidia.dali.backend_impl.TensorListCPU object at 0x7f77f819a0b0>)
TensorListGPU 即为在 GPU 上的 tensors,采用 as_cpu 可以将 GPU 数据复制到 CPU:
images, labels = pipe_out
show_images(images.as_cpu())
输出如:
注: DALI 库不支持将数据在管道内部从 GPU 移动到 CPU. 在所有执行路径中,CPU运算符不能跟在GPU运算符后面.
3.6.2. 混合解码(Hybrid decoding)
在某些场景下,尤其是,高分辨率图片,JPEG格式存储的图片的解码是一个瓶颈. 对此,开发了 nvJPEG 库和 nvJPEG2000 库. 其将解码过程分为 CPU 和 GPU,显著降低解码时间.
指定 mixed 参数,以开启 nvJPEG 支持. 其它格式的文件仍在 CPU 上进行解码.
nvJPEG
@pipeline_def
def hybrid_pipeline():
    jpegs, labels = fn.readers.file(file_root=image_dir, random_shuffle=True, initial_fill=21)
    images = fn.decoders.image(jpegs, device='mixed') #'mixed'参数

    return images, labels
#
pipe = hybrid_pipeline(batch_size=max_batch_size, num_threads=1, device_id=0, seed=1234)
pipe.build()

#
pipe_out = pipe.run()
images, labels = pipe_out
show_images(images.as_cpu())
设置 device='mixed' 参数,将使用混合方法同时在 CPU 和 GPU 上进行计算. 也就是说,其接收 CPU 输入,但返回 GPU 输出.
输出如:

cpu 和 mixed 速度对比:
from timeit import default_timer as timer

test_batch_size = 64

def speedtest(pipeline, batch, n_threads):
    pipe = pipeline(batch_size=batch, num_threads=n_threads, device_id=0)
    pipe.build()
    # warmup
    for i in range(5):
        pipe.run()
    # test
    n_test = 20
    t_start = timer()
    for i in range(n_test):
        pipe.run()
    t = timer() - t_start
    print("Speed: {} imgs/s".format((n_test * batch)/t))

#
speedtest(shuffled_pipeline, test_batch_size, 4)
#Speed: 3148.9324633140664 imgs/s

#
speedtest(hybrid_pipeline, test_batch_size, 4)
#Speed: 5963.145339307848 imgs/s