Github - libvips/pyvips
pyvips 库并不是直接处理图片,而是创建图片处理的管道(pipelines). 当管道建立后,一次性的执行整个管道,一次性的将图片从源图像并行的流传输到目的.
pyvips 特点:
[1] - pyvips 是并行的,所以其速度快;
[2] - pyvips 并不在内存中保存整个图像,所以其占用内存小;
pyvips 和常用图像处理库的速度与占用内存对比可见:libvips/wiki/Speed-and-memory-use.
加载非常大的 tiff 图像,缩放10%、锐化、保存,pyvips 一般比 ImageMagick 快 3x,内存占用少 5x.
1. pyvips 安装
https://libvips.github.io/libvips/install.html
pip install pyvips
sudo apt install libvips
2. pipeline 示例
如,加载 JPG 图像,green 通道的每个像素值翻倍,重新将图片保存:
import pyvips

image = pyvips.Image.new_from_file('test.jpg', access='sequential')
image *= [1, 2, 1]
mask = pyvips.Image.new_from_array([[-1, -1, -1],
                                    [-1, 16, -1],
                                    [-1, -1, -1]
                                   ], scale=8)
image = image.conv(mask, precision='integer')
image.write_to_file('test_new.jpg')
3. pil-numpy-pyvips
pil-numpy-pyvips.py
#!/usr/bin/python3
#!--*-- coding: utf-8 --*--
import sys
import time

import pyvips
from PIL import Image
import numpy as np

if len(sys.argv) != 3:
    print('usage: {0} input-filename output-filename'.format(sys.argv[0]))
    sys.exit(-1)

# map vips formats to np dtypes
format_to_dtype = {
    'uchar': np.uint8,
    'char': np.int8,
    'ushort': np.uint16,
    'short': np.int16,
    'uint': np.uint32,
    'int': np.int32,
    'float': np.float32,
    'double': np.float64,
    'complex': np.complex64,
    'dpcomplex': np.complex128,
}

# map np dtypes to vips
dtype_to_format = {
    'uint8': 'uchar',
    'int8': 'char',
    'uint16': 'ushort',
    'int16': 'short',
    'uint32': 'uint',
    'int32': 'int',
    'float32': 'float',
    'float64': 'double',
    'complex64': 'complex',
    'complex128': 'dpcomplex',
}


# numpy array to vips image
def numpy2vips(a):
    height, width, bands = a.shape
    linear = a.reshape(width * height * bands)
    vi = pyvips.Image.new_from_memory(linear.data, width, height, bands,
                                      dtype_to_format[str(a.dtype)])
    return vi


# vips image to numpy array
def vips2numpy(vi):
    return np.ndarray(buffer=vi.write_to_memory(),
                      dtype=format_to_dtype[vi.format],
                      shape=[vi.height, vi.width, vi.bands])


# load with PIL
start_pillow = time.time()
pillow_img = np.asarray(Image.open(sys.argv[1]))
print('Pillow Time:', time.time() - start_pillow)
print('pil shape', pillow_img.shape)

# load with vips to a memory array
start_vips = time.time()
img = pyvips.Image.new_from_file(sys.argv[1])
np_3d = vips2numpy(img)

print('Vips Time:', time.time() - start_vips)
print('vips shape', np_3d.shape)

# make a vips image from the numpy array
vi = numpy2vips(pillow_img)

# verify we have the same result
# this can be non-zero for formats like jpg if the two libraries are using
# different libjpg versions ... try with png instead
print('Average pil/vips difference:', (vi - img).avg())

# and write back to disc for checking
vi.write_to_file(sys.argv[2])
4. read_profile
read_profile.py
#!/usr/bin/python3
import sys
import pyvips

a = pyvips.Image.new_from_file(sys.argv[1])

profile = a.get("icc-profile-data")

with open('x.icm', 'w') as f:
    f.write(profile)
5. orientation
orientation.py
#!/usr/bin/python3
import sys
import pyvips

a = pyvips.Image.new_from_file(sys.argv[1])

try:
    orientation = a.get('exif-ifd0-Orientation')
    a.set('orientation', int(orientation.split()[0]))
except Exception:
    a.set('orientation', 0)

a.write_to_file(sys.argv[2])
6. 文字水印
watermark.py
#!/usr/bin/python3
import sys
import pyvips

#
im = pyvips.Image.new_from_file(sys.argv[1], access="sequential")
text = pyvips.Image.text(sys.argv[3], width=500, dpi=300, align="centre")

# drop any alpha
if im.hasalpha():
    no_alpha = im.extract_band(0, n=im.bands - 1)
else:
    no_alpha = im

# colours have four parts in cmyk images
if im.bands == 4:
    text_colour = [0, 255, 0, 0]
elif im.bands == 3:
    text_colour = [255, 0, 0]
else:
    text_colour = 255

overlay = no_alpha.new_from_image(text_colour)
overlay = overlay.bandjoin((text * 0.5).cast("uchar"))

# position overlay at the bottom left, with a margin
im = im.composite(overlay, "over", x=100, y=im.height - text.height - 100)

im.write_to_file(sys.argv[2])
7. 图片水印
watermark_image.py
#!/usr/bin/python3
import sys
import pyvips

image = pyvips.Image.new_from_file(sys.argv[1], access="sequential")
watermark = pyvips.Image.new_from_file(sys.argv[3], access="sequential")

# downsize the image by 50%
image = image.resize(0.5)

# set the watermark alpha to 20% (multiply A of RGBA by 0.2).
watermark *= [1, 1, 1, 0.2]

# overlay the watermark at the bottom left, with a 100 pixel margin
image = image.composite(watermark, "over",
                        x=100, y=image.height - watermark.height - 100)

image.write_to_file(sys.argv[2])
8. 文字水印
watermark_context.py
#!/usr/bin/python3
# watermark an image, but do it in a context-sensitive way, so we will write
# black if the area we are overlaying the text on is white, for example
import sys
import pyvips
# zero-excluding average of an image ... return as an array, with the average
# for each band
def avgze(image):
# since we use histograms
if image.format != "uchar" and image.format != "ushort":
raise Exception("uchar and ushort images only")
# take the histogram, and set the count for 0 pixels to 0, removing them
histze = image.hist_find().insert(pyvips.Image.black(1, 1), 0, 0)
# number of non-zero pixels in each band
nnz = [histze[i].avg() * histze.width * histze.height
for i in range(histze.bands)]
# multiply by the identity function and we get the sum of non-zero
# pixels ... for 16-bit images, we need a larger identity
# function
totalze = histze * pyvips.Image.identity(ushort=histze.width > 256)
# find average value in each band
avgze = [totalze[i].avg() * histze.width * histze.height / nnz[i]
for i in range(totalze.bands)]
return avgze
# find an opposing colour ... we split the density range (0 .. mx) into three:
# values in the bottom third move to the top, values in the top third move to
# the bottom, and values in the middle also move to the bottom
def oppose(value, mx):
if value < mx / 3:
# bottom goes up
return mx / 3 - value + 2 * mx / 3
elif value < 2 * mx / 3:
# middle goes down
return 2 * mx / 3 - value
else:
# top goes down
return mx - value
im = pyvips.Image.new_from_file(sys.argv[1])
text = pyvips.Image.text(sys.argv[3], width=500, dpi=300, align="centre")
text = text.rotate(45)
# the position of the overlay in the image
left = 100
top = im.height - text.height - 100
# find the non-alpha image bands
if im.hasalpha():
no_alpha = im.extract_band(0, n=im.bands - 1)
else:
no_alpha = im
# the pixels we will render the overlay on top of
bg = no_alpha.crop(left, top, text.width, text.height)
# mask the background with the text, so all non-text areas become zero, and
# find the zero-excluding average
avg = avgze(text.ifthenelse(bg, 0))
# for each band, find the opposing value
mx = 255 if im.format == "uchar" else 65535
text_colour = [oppose(avg[i], mx) for i in range(len(avg))]
# make an overlay ... we put solid colour into the image and set a faded
# version of the text mask as the alpha
overlay = bg.new_from_image(text_colour)
overlay = overlay.bandjoin((text * 0.5).cast("uchar"))
# and composite that on to the original image
im = im.composite(overlay, "over", x=left, y=top)
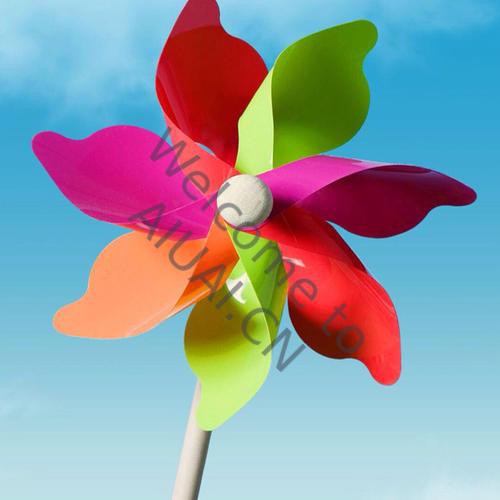
im.write_to_file(sys.argv[2])使用:
python watermark_context.py /path/to/aiuai.jpg x.jpg "Welcome to AIUAI.CN"如:
相关
[1] - https://stackoverflow.com/questions/53050625/pyvips-vs-pillow-upscaling-image-quality
3 条评论
你好,我想询问下,pyvips里面的resize函数,如果想调整的长宽比例不一样,比如说想让原图与目标图像的height的比是0.5,width的比是0.3,那应该怎么操作呢?
被这个问题卡住了很久,谢谢!
可以用 PIL 的resize
好的,我最后也是直接用PIL了,谢谢解答~